Schedule Appointment for New Customer
- Login to the admin panel of your scheduler.
- Click Schedule in the navigation bar.
- Select a day and time and click the plus sign.
- Select a reason for the appointment.
- Click Save.
- Enter customer and appointment information.
- Click Send.
Screenshots
Login to the admin panel of your scheduler
1
Click Schedule in the navigation bar
2
Select a day and time and click the plus sign
3
Select a reason for the appointment
4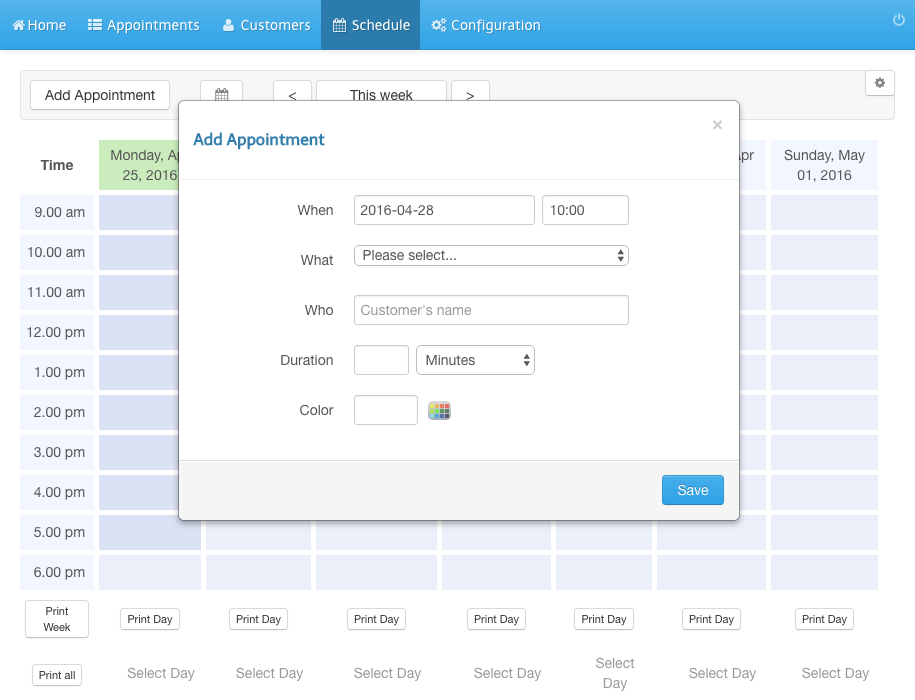
Click Save
5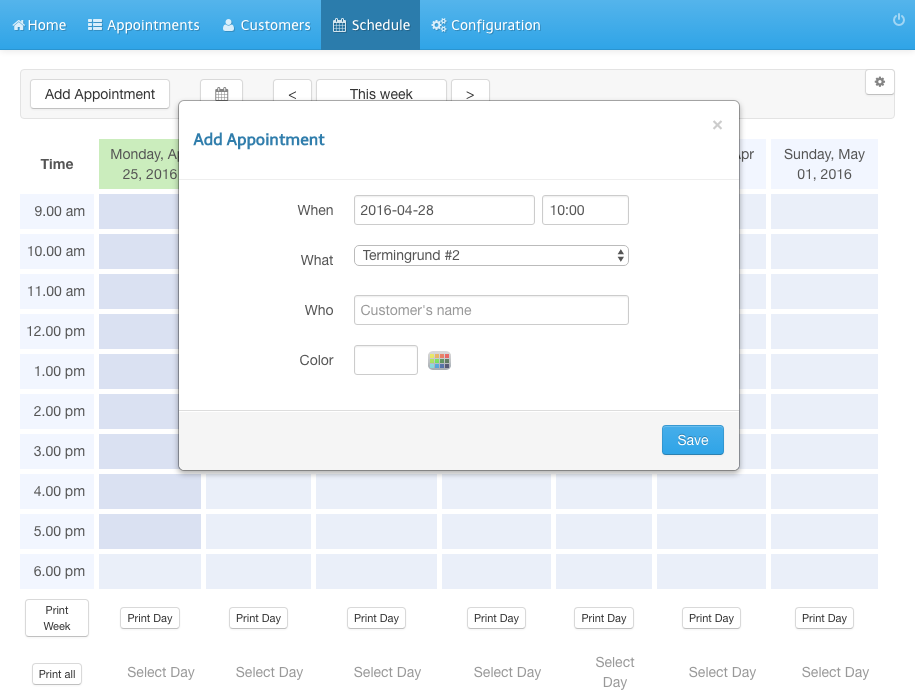
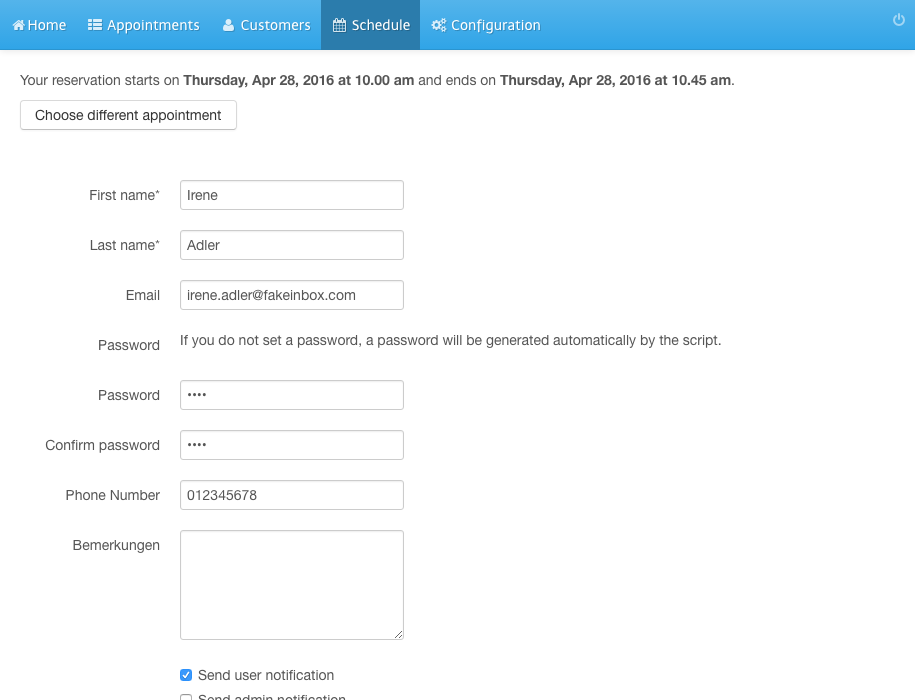
Enter customer and appointment information
6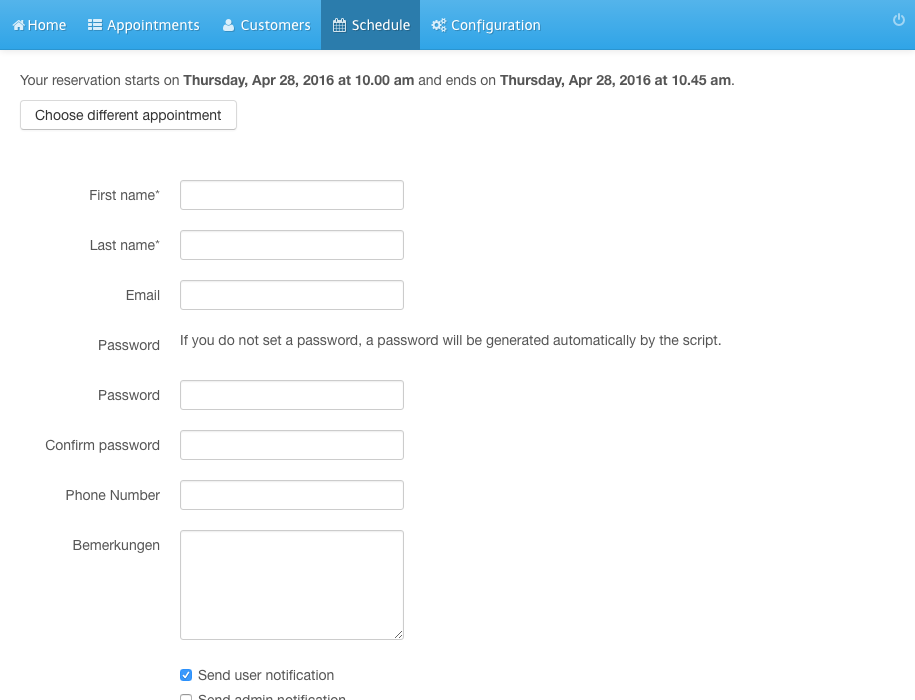
Click Send
7