Sync your calendar with Android and DAVx5
To synchronize with Android you need the app DAVx5, which you can download from the Google Play Store.
- At Appointmind, select CalDAV other under Synchronization.
- Activate the appointment sync at Appointmind, save the changes and then select your calendar.
- Open DAVx5 on your smartphone and tap the plus sign to add a new account.
- Select Login with URL and user name.
- Copy the URL at Appointmind.
- Paste the URL into DAVx5.
- Copy the user name (a number) at Appointmind.
- Paste the user name into DAVx5.
- Think up a password, enter it at Appointmind and save the changes.
- Enter the same password in DAVx5.
- Tap Login.
- Enter an email address for the account.
- Tap Create account.
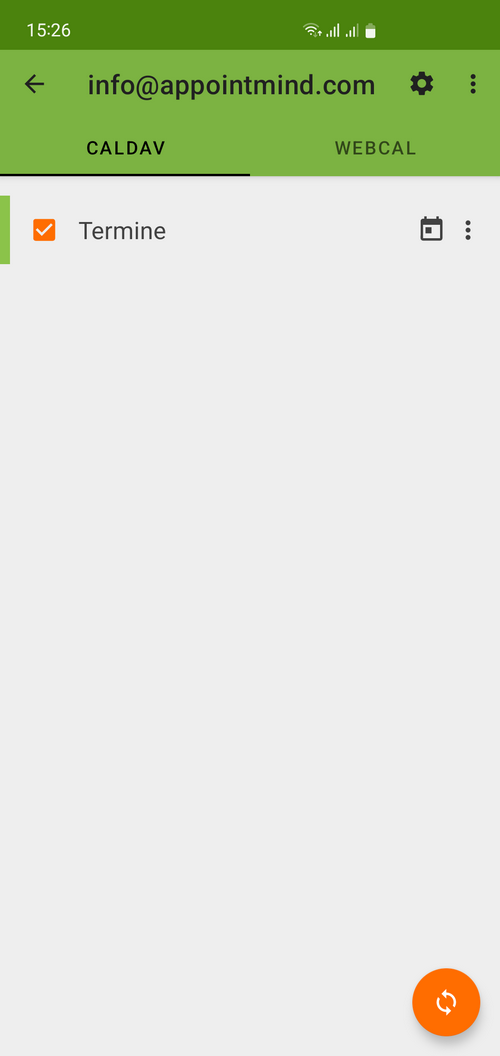
- The calendar must be ticked.
- You can run the synchronization manually to test the settings.
Screenshots
At Appointmind, select CalDAV other under Synchronization
1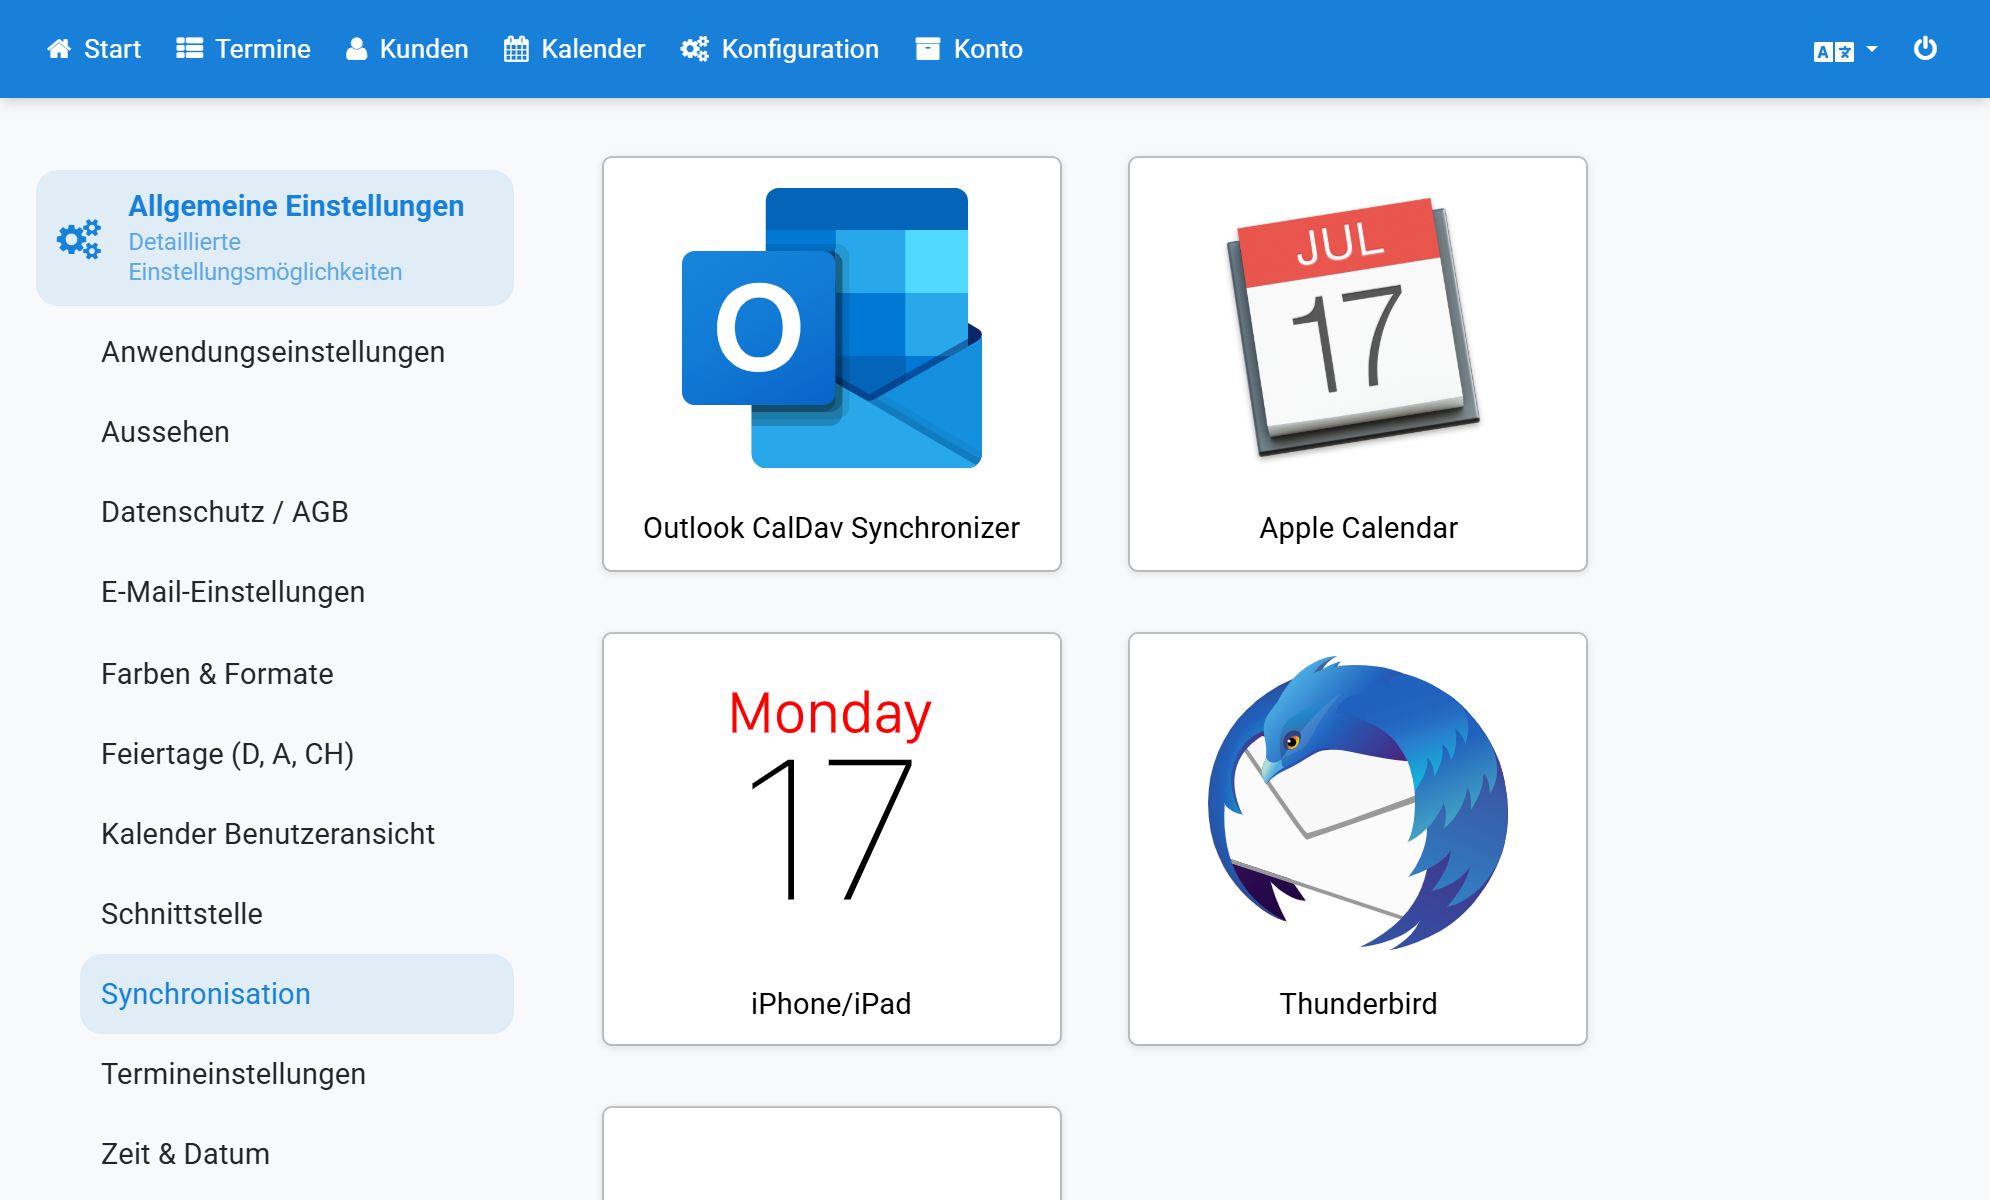
Activate the appointment sync at Appointmind, save the changes and then select your calendar
2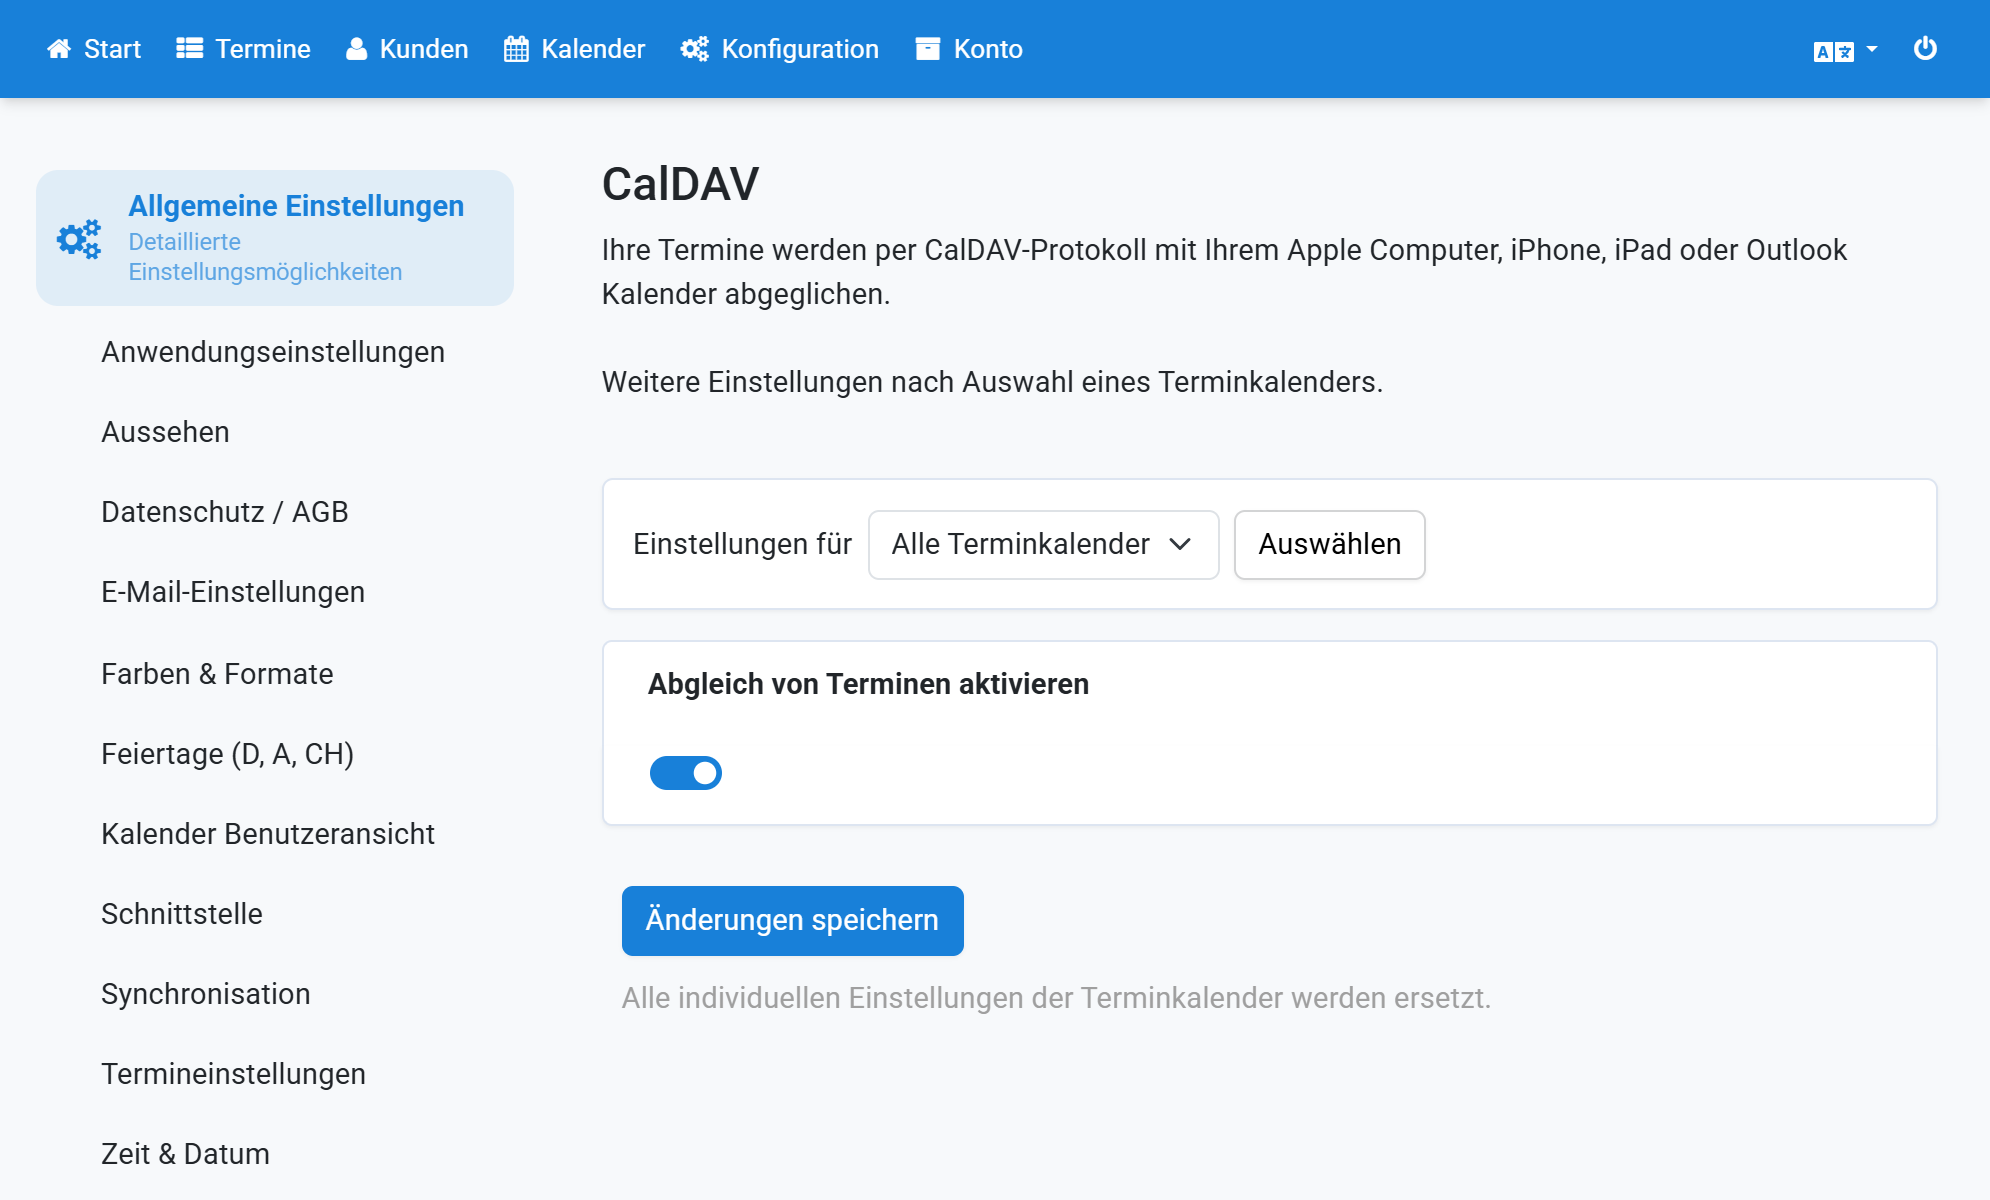
Open DAVx5 on your smartphone and tap the plus sign to add a new account
3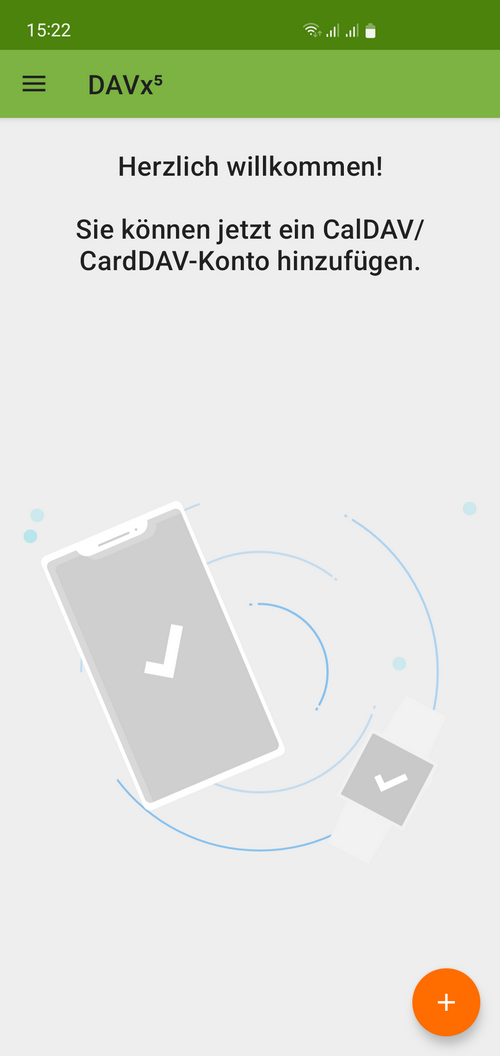
Select Login with URL and user name
4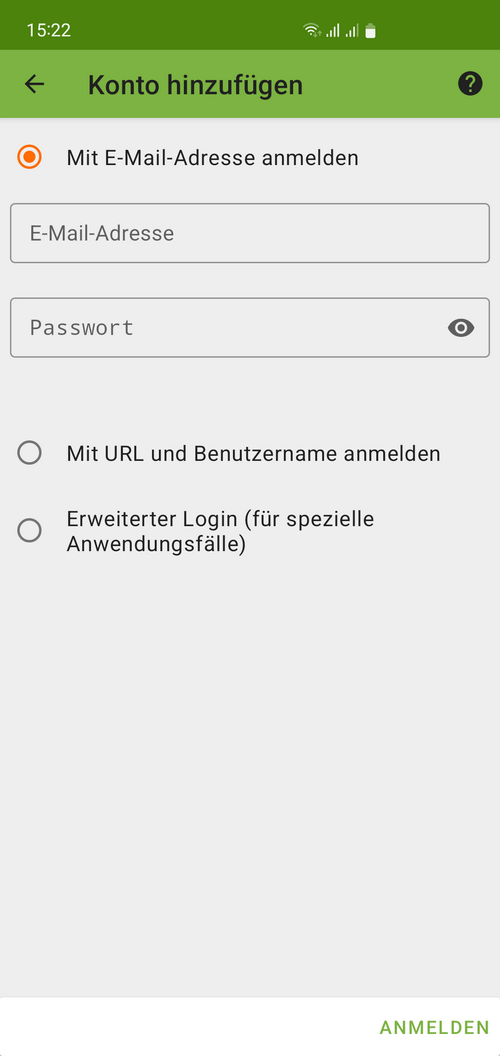
Copy the URL at Appointmind
5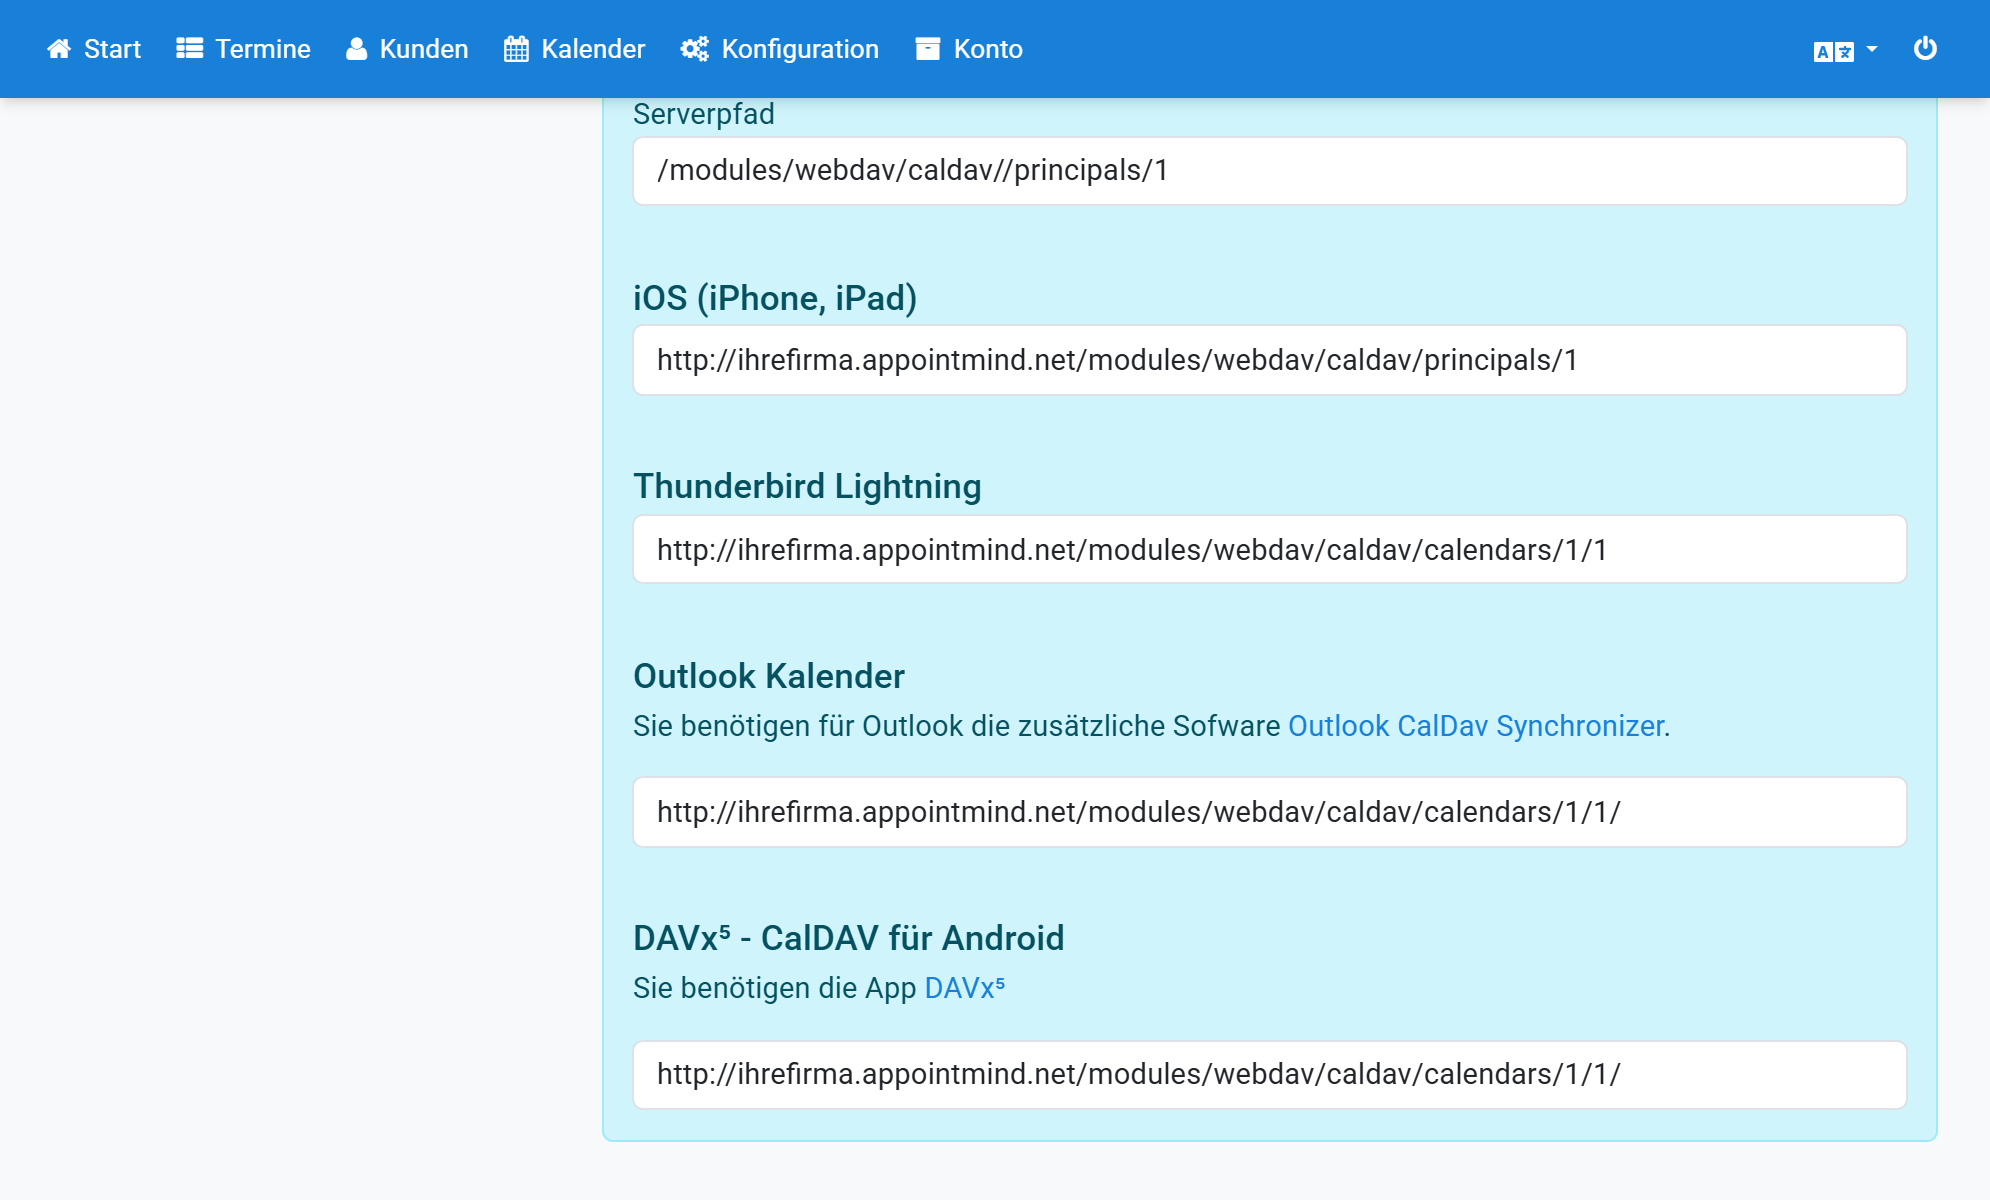
Paste the URL into DAVx5
6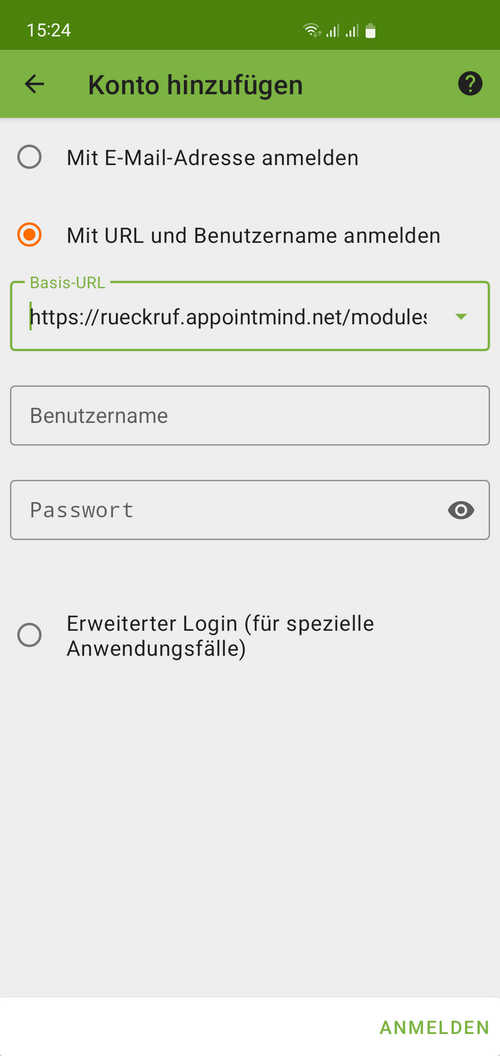
Copy the user name (a number) at Appointmind
7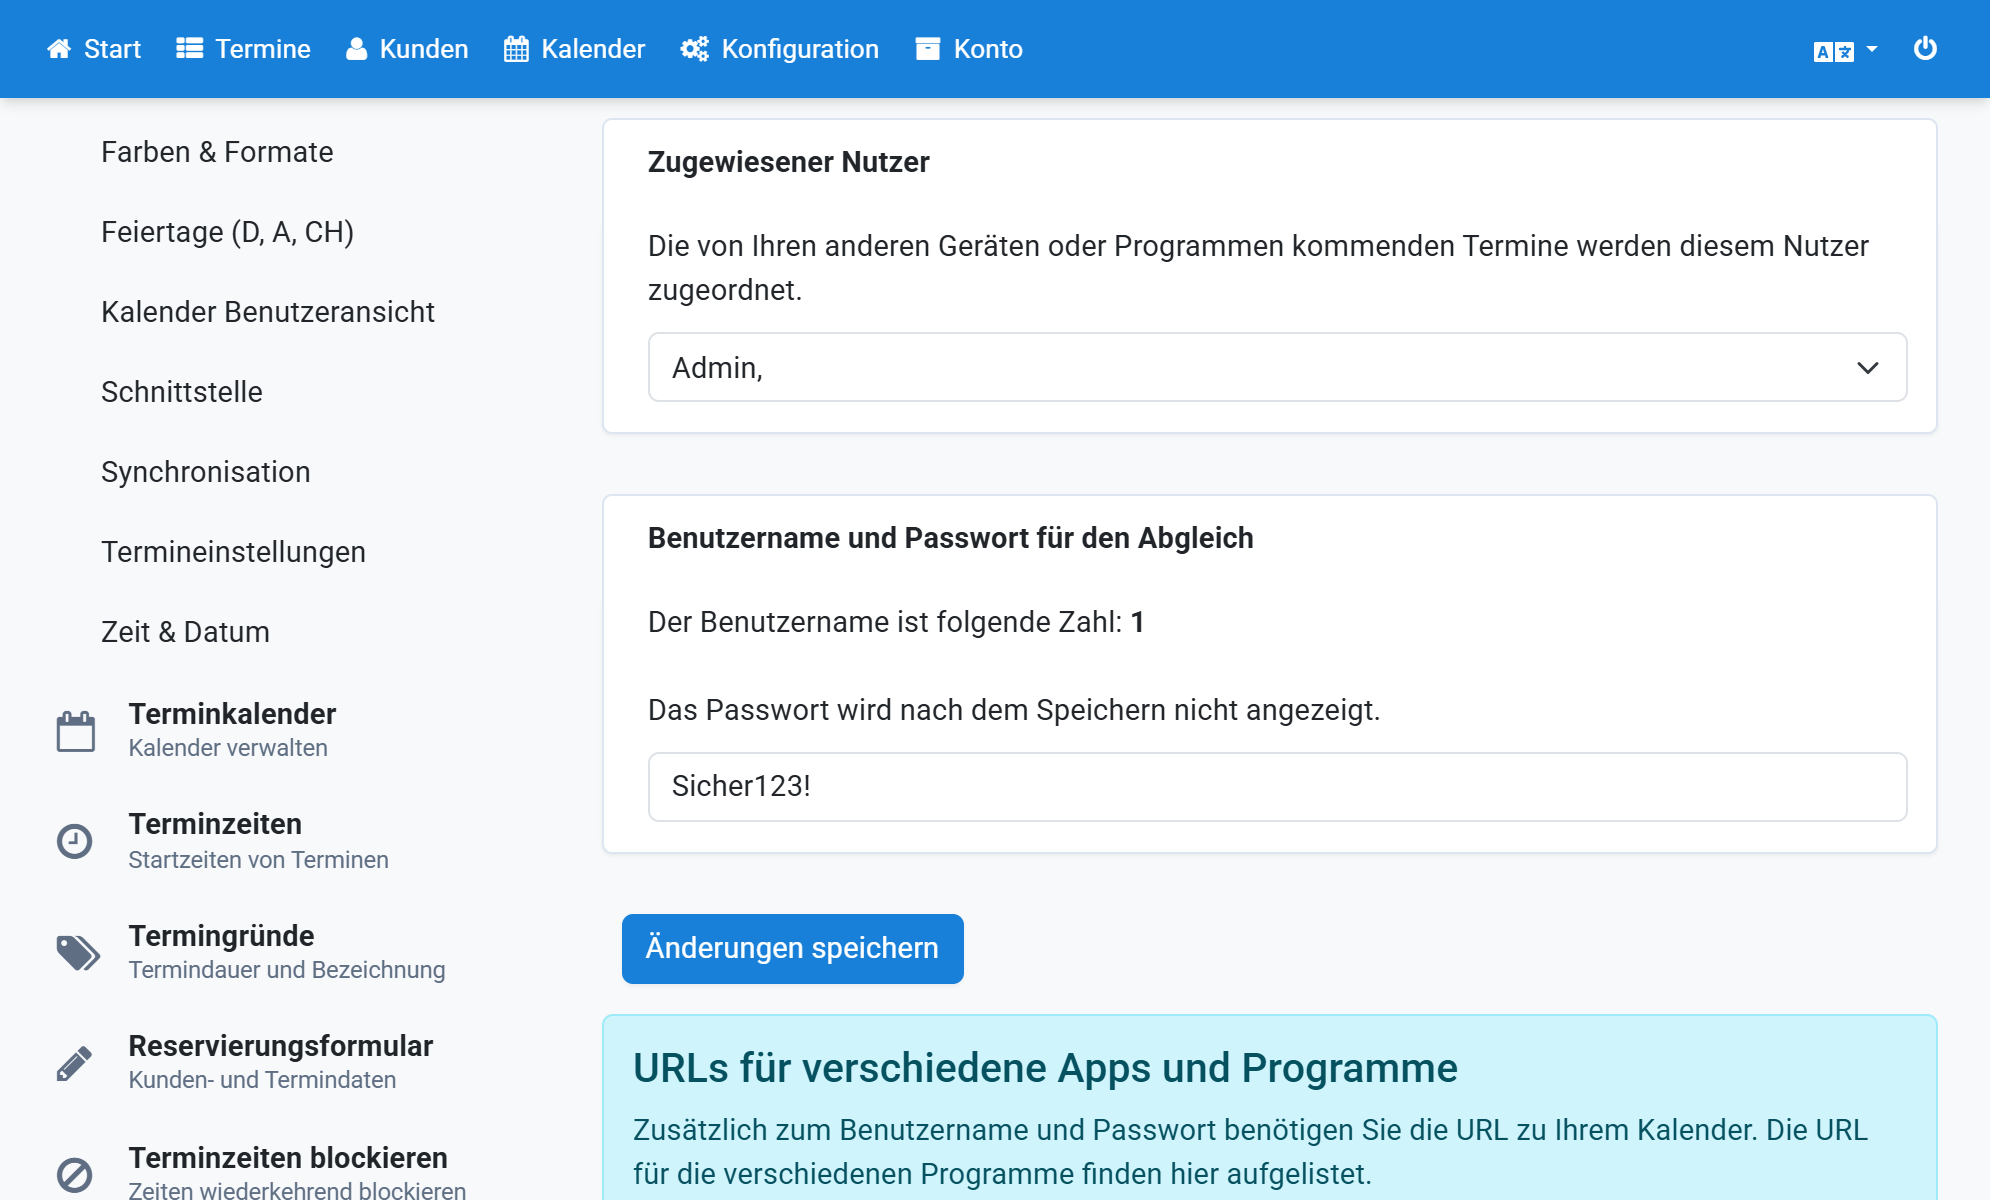
Paste the user name into DAVx5
8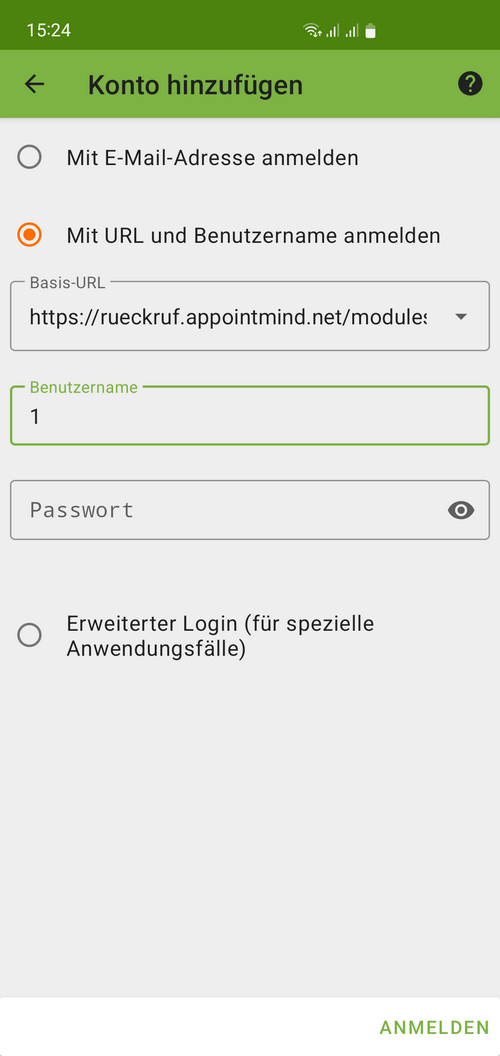
Think up a password, enter it at Appointmind and save the changes
9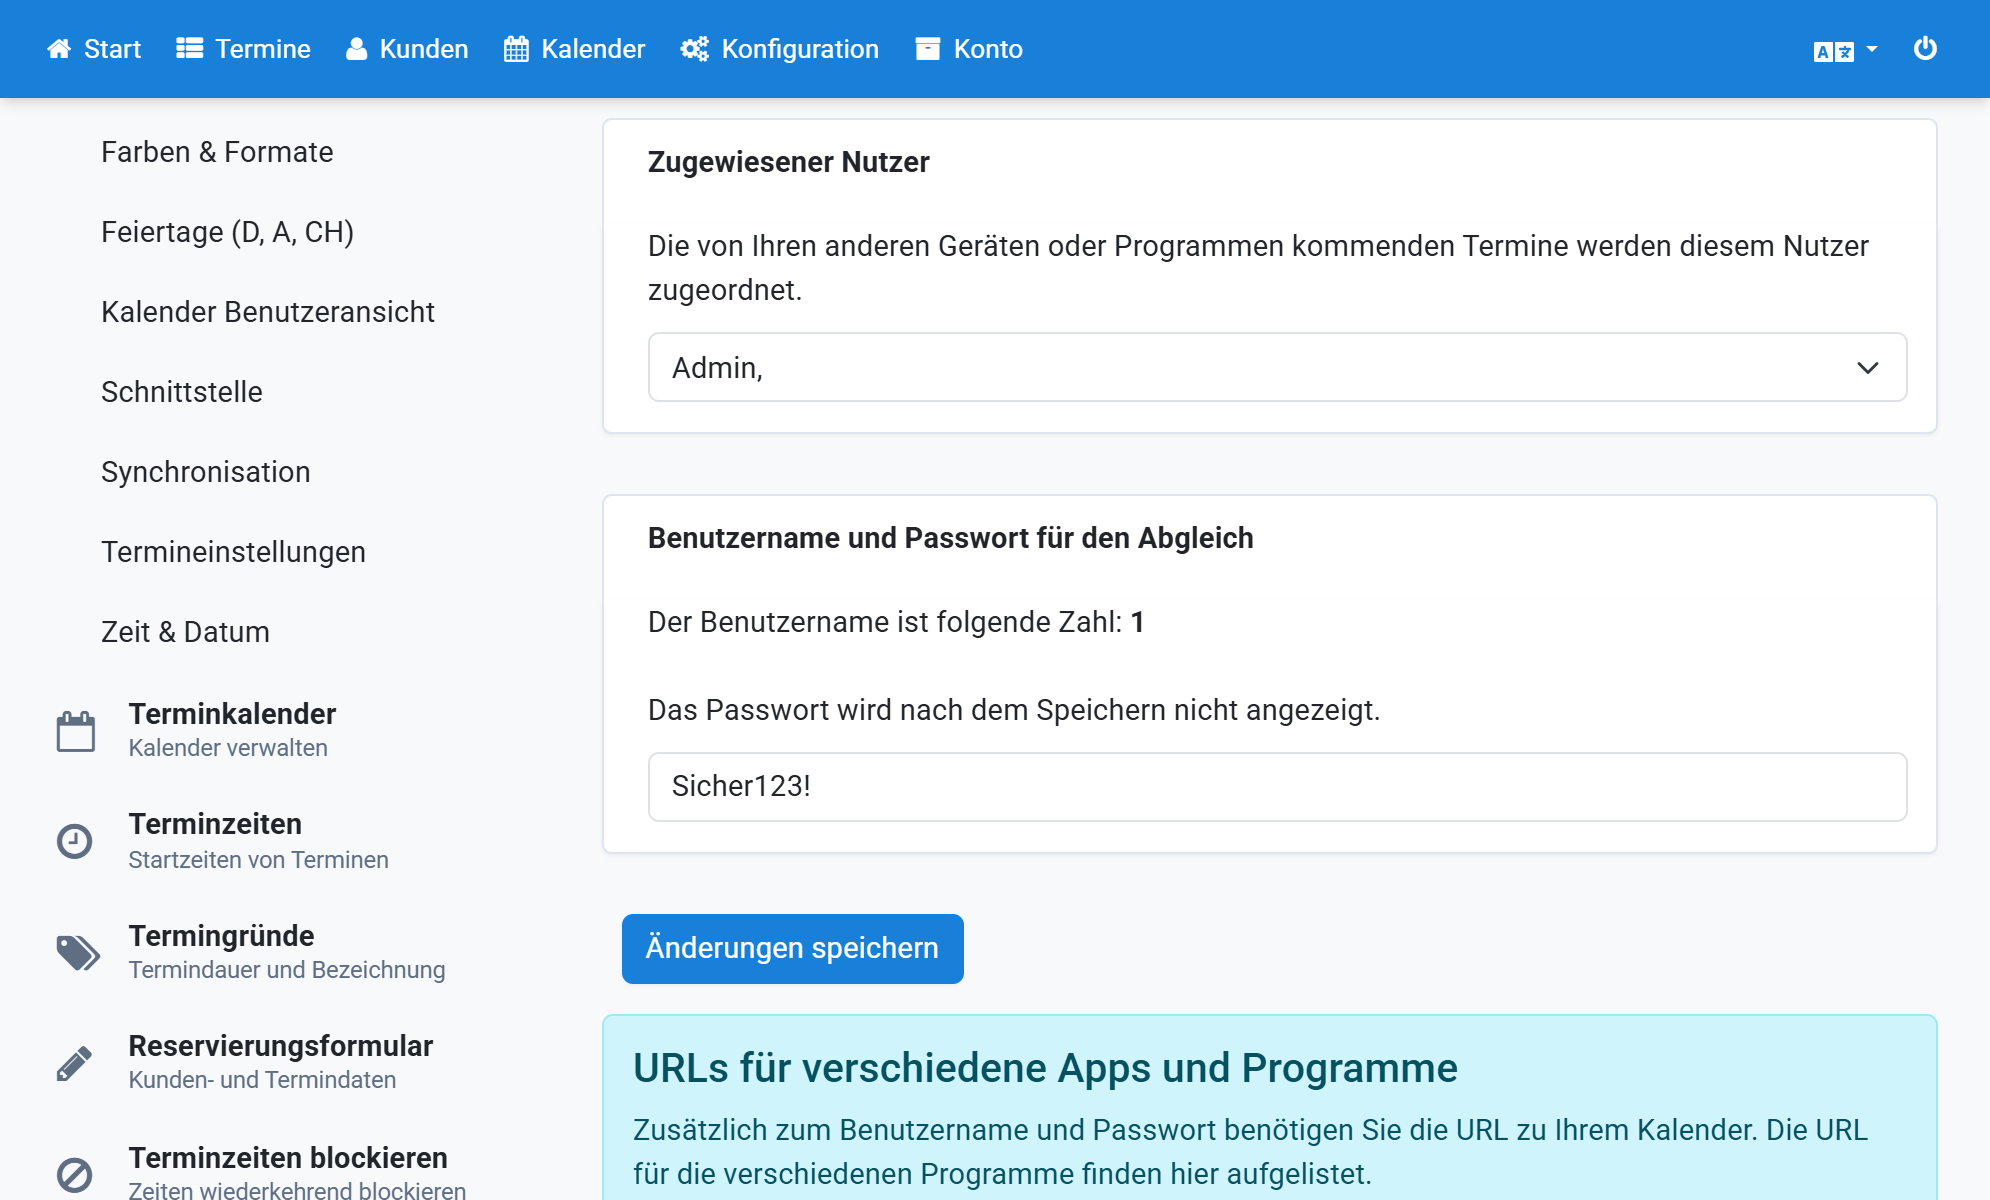
Enter the same password in DAVx5
10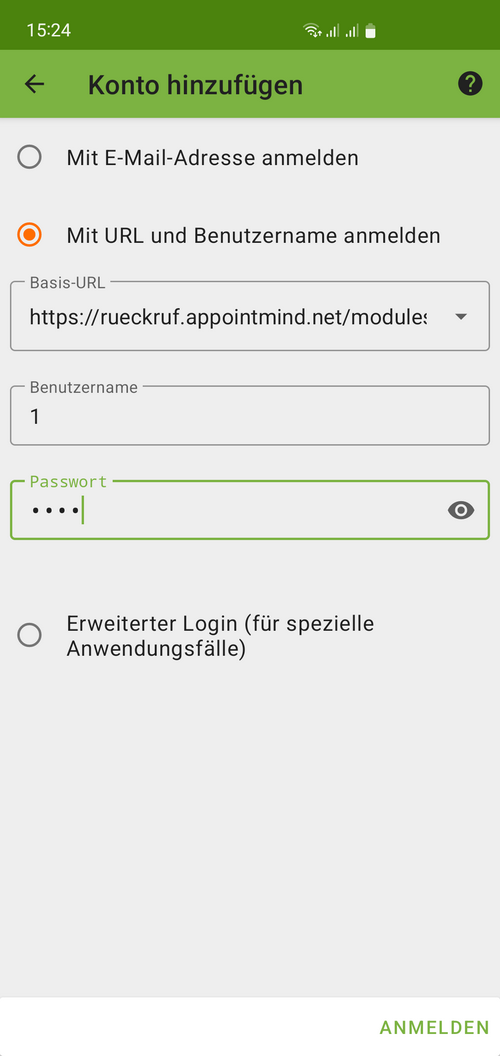
Tap Login
11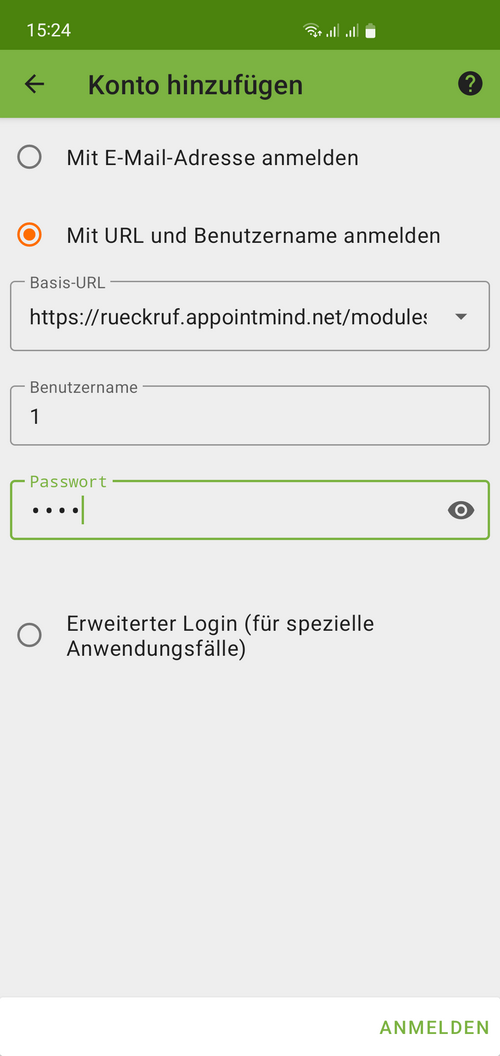
Enter an email address for the account
12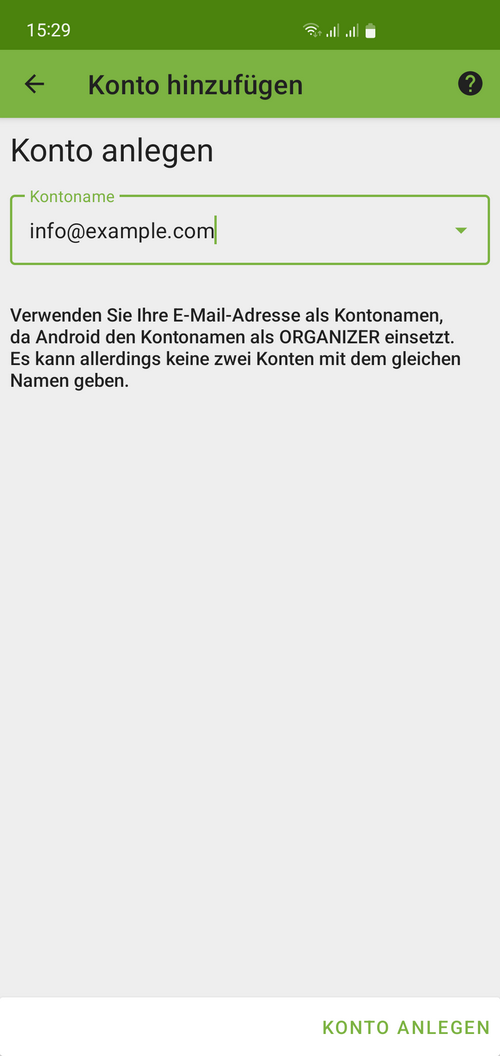
Tap Create account
13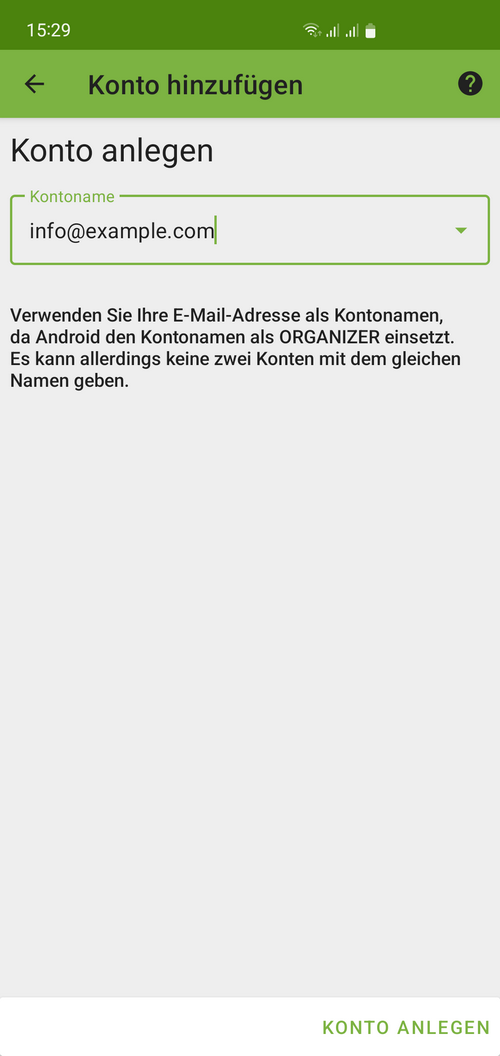
The calendar must be ticked
14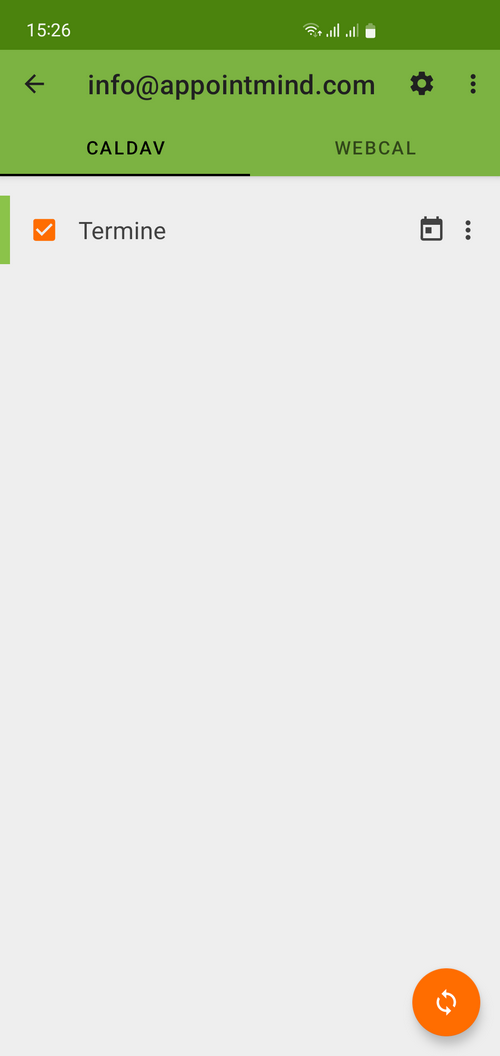
You can run the synchronization manually to test the settings
15